Irrigation–Watering Your Garden
There are many options for watering your garden. Here are the pros and cons of each method.
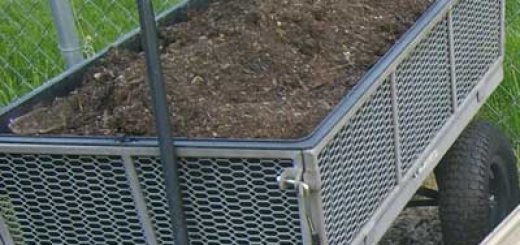
Bucket
 Here is the simplest method of watering your garden–a bucket of sun-warmed water with a cup or pitcher. This is what I use until I turn on my irrigation system. In his book, Mel Bartholemew suggests using a cup, and watering one cup per plant. That is a little too tedious for me, so I’ve upgraded to a pitcher. He recommends “sun-warmed” water because it gives the soil and plants a little heat boost, which is nice during cooler weather.
| Pros | Cons |
|---|---|
| Minimal equipment needed Inexpensive Anyone can do it Applies water to soil only |
Labor intensive Not automated |
Hand watering also forces you to visit your garden on a regular basis to water and tend the plants. You are more likely to notice early signs of damage or disease. I water this way in the early spring, but soon I get tired of sweating it out just to give my plants a drink. Also, you have to find a friend to come water if you go on vacation.
Hose
 Another simple irrigation method is to water your garden with a hose. Although it is easy, it has a few more drawbacks. Like the bucket method, it requires a friend or neighbor if you want to go on vacation. Using a hose showers the leaves so you are more likely to have problems with mold and fungus. Also, it’s hard to ensure a very even watering, or to water deeply.
| Pros | Cons |
|---|---|
| Minimal equipment needed Inexpensive Anyone can do it |
Labor intensive Not automated Applies water to leaves Possible disease Soil is loose and splatters around |
Soaker Hose
 Another option is to purchase a soaker hose–this is a special kind of hose that is porous and allows water to seep out slowly. This is less work, but you have to remember to turn it on and (more importantly) off. You can’t control which plants receive more water, and it doesn’t water very evenly. Still, this is a viable option that many gardeners like to use.
| Pros | Cons |
|---|---|
| Minimal equipment needed Inexpensive Anyone can do it Applies water to the soil only |
Not automated Have to turn it on and off Uneven watering |
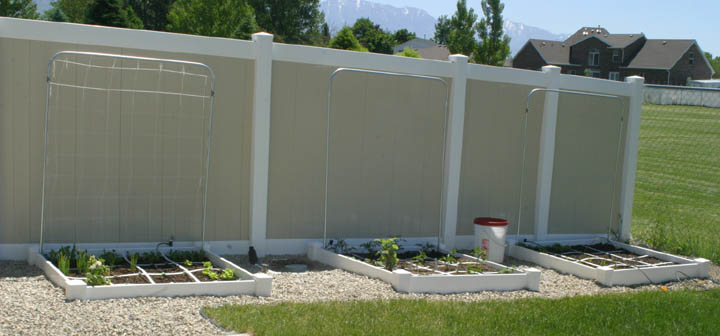
PVC and Spray Nozzles

If you are handy, you can put together an above ground sprinkler system with PVC and sprinkler heads that will attach to your hose. While the spray nozzles will water the leaves, you can choose different nozzles for different plants, thus customizing the optimal amount of water. PVC is meant to be buried; the sun and wind will dry it out over time making it brittle. Like the soaker hose, this has to be manually turned on and off.
| Pros | Cons |
|---|---|
| Less work Waters more evenly Custom watering |
Not automated Have to turn it on and off Applies water to leaves Possible disease Requires supplies and know-how |
Timer
If you are using a soaker hose or PVC system, you might try adding a timer. This would automate your system. I have a friend who has done this, and she says the timer usually lasts about a year.
Automatic Sprinklers
 If you have automatic sprinklers, you can either “mooch” off the existing nozzles by extending the spray to cover the garden, or install new sprinkler heads specifically for the garden areas.
| Pros | Cons |
|---|---|
| Automatic Easy |
Applies water to leaves Possible disease Mooch-can’t control amount of water Sprinkler head–Requires supplies and know-how |
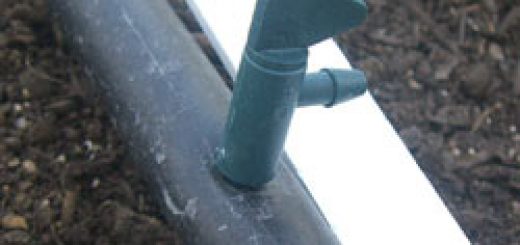
Automated Drip Irrigation System

If you can, using an automated drip irrigation system is ideal. Water is dripped directly onto the soil, and you can adjust the amount of water for each type of plant. This method is more expensive up front, although the cost can be reduced if you have the skills to install it yourself. Follow this link for detailed instructions on building an automated irrigation system.
The only other disadvantage is that it does not make you visit your garden so often, so you might miss early signs of disease or distress among your plants.
| Pros | Cons |
|---|---|
| Automatic Easy Applies water to soil only Custom watering |
Requires supplies and know-how |

Doug–how often to water will be based on the plant, but also on how much it rains and how hot it is in your area. Mel’s Mix drains more quickly than the soil around here with a lot of clay in it. While traditional gardeners might plant every X number of days, it really has to be adjusted with Mel’s Mix. The best thing to do is to hand water for a short while, and wait until they start to wilt just a little. At that point you know they need water. Once you have a good idea of how much water they need, you can make it more automated.
if you read pg 115 of Mel’s original book he recommends watering twice a week with what he at that time called ‘Patio Gardening’ 🙂 It is kinda funny to read the old book – which is better – and his ‘new book’.
Emily,
does you ebook give an indication of how often particular plants should be watered? Eg. Tomatoes 10 to 14 days, Lettuce, twice a week, etc.
One thing that you didn’t mention that are effective and relatively cheap are home made drips, like using old soda bottles with pin holes, or clay pots. These will allow you to go on vacation without huge expense for irrigation. I did note that you live in a more arid area than I do, though, so what is viable for me may not be for you.
I love the drip irrigation system! Be sure to research before you do it though because we thought we knew what we were doing, but it turns out we didn’t. We ended up having to re-buy a whole bunch of parts because we bought the wrong ones 🙁
It all turned out well in the end though and I love not having to worry about watering my garden!
Hello, what is your finally drip irrgation design that you like?