Starting Seeds Indoors (Update)
Since I posted about this last year, I have improved my methods and wanted to share!
Supplies:
- Seeds
- Peat pots (Jiffy size 3)
- Potting soil
- Bucket (the size you’d use for mopping)
- Labels (I use bendy straws)
- Permanent marker
- Pencil
- Storage containers with lids
- Heat lamp (super cheap from Home Depot)
- Grow lights (I use two shop lights)
- Fertilizer (optional)
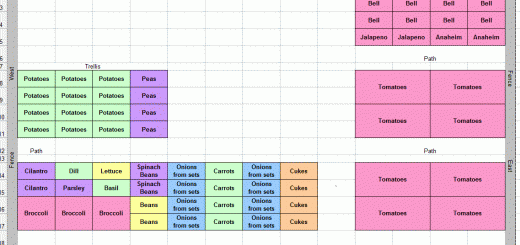
To begin with, I always refer back to my garden plan to determine how many plants I need to start. This year I wanted 4 broccoli, 2 cabbage, and 2 parsley plants. To be safe, I decided to start 6 broccoli, 3 cabbage, and 3 parsley. IF all the seeds germinate and IF all the plants survive hardening and THEN survive a few days after transplanting, only THEN do I give my extra plants to a friend! I need 16 peppers and 8 tomatoes so I just did one extra plant for each variety I am growing.
I count out the pots, then fill my bucket with potting soil. I bought the type of soil that is supposed to feed the plants for up to 3 months. I put it in the sink, and turn on the water. I mix it with my hands until I have a good layer of damp (not sopping wet) soil.
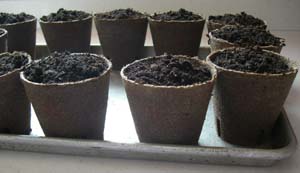
Then I use my hands–they are already filthy–to fill each pot. I write on each label, and put it in the soil.
I open one seed packet at a time, poke holes with my pencil, place 2-3 seeds in each hole, then cover. Then it’s on to the next packet!
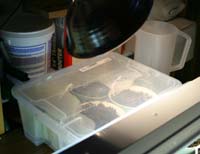
Once all my seeds are planted I place the pots into a storage tupperware and water them well. Again–not sopping wet or the seeds will rot.
With the lid on and placed in a warm spot (I put mine under a heat lamp), the seeds germinate really quickly. The lid keeps everything moist and warm–perfect conditions for those little seeds.

After the seeds germinate I take the lid off and place them under the grow lights. After a couple of weeks I thin down to just one plant. A little hint on this–I often leave the smallest plant, especially if the big ones are leggy. It’s painful to snip away at those baby plants, but I remember that I have several extras as backup, and I’m okay.
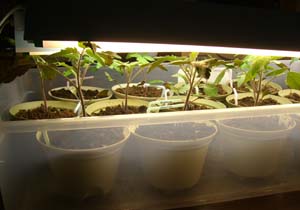
I keep the grow lights really close to the plants so they don’t get too tall and “leggy.” My broccoli and cabbage responded so well–I had nice bushy plants. My tomatoes seem to be a little tall, but I don’t mind since I can plant them “sideways”. After a month or so I fertilize, and again every 2-3 weeks.
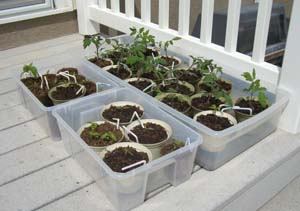
When it comes time to harden off the plants, I just carry the containers outside and set them in the shade. I hardened off my broccoli for a week, but I’ve been taking my tomatoes and peppers outside already, even though I won’t transplant them for at least 3 more weeks. The plants do better with wind and sunshine!
So the main changes I made were PEAT POTS and STORAGE CONTAINERS. Here is why–the peat pots made it easy to tell when the plants needed watering. Also, I felt like those plants watered more evenly than the plastic pots (I had to do some plastic pots because I couldn’t find enough peat pots when it was time to plant). Also, the peat pots fit much better into the storage containers. I could fit 12 peat pots in the space that held only 4 plastic pots. They are small enough to fit, but large enough to accommodate the plant from start to transplanting in the garden. No need to “upsize.”
The storage containers made it easy to water from the bottom and kept things really clean (relative to a shallow tray). The best part was how easy it was to move them around–I am able to take them outside during the day and move them back in at night without difficult or a mess!



This means your plants are “leggy”–long and spindly. This is because they are “reaching” to get the light. Indoor light is not nearly as intense as natural light (hence, no sunburns inside), and does not provide enough energy for vegetables to grow in a healthy way.
To be effective, your grow lights should be 1-2″ above the plants, be on 12-16 hours a day, and the plants should have some period of darkness.
My plants are growing tall and spindlely. We only put the grow light on at night, as there is plenty of light thru the day. My seeds all start, just have the real tall thin stalks–can you help?
I fertilize every 4-6 weeks. If you used potting soil with plant food (ie: fertilizer) in it, you shouldn’t need to add anything for at least a month. If not, maybe 2 weeks after they germinate.
when should i first start feeding the plants after they germinate
Hi there. So I became a fan of square foot gardening last year when I tried it and it um actually worked for me!!! Whoo hoo. My brown thumbs could never have been greener. I actually fell I can do this stuff. Anyhoo, I found your site and LOVE it.
I refer to it a lot and as a thanks I thought I would share another web site with you that I have found to be very interesting. This guy does a lot of little tests on the best of this and that and gardening is a big area for him. Here is a link where he show which indoor lighting method is the best and why. The results are impressive and have me totally convinced. He goes about things in a VERY scientific un biased way. He even has a link on the best tasting tomato viarieties… my personal fav. Enjoy http://www.waynesthisandthat.com/fluorescent.html -Brook
Hope you really like it 🙂
I think with lights and a heating mat in your garage you will be okay. Just be sure you have a thermometer that you can monitor the temperatures. As for the deck option, you’d need a way to keep it about 70 degrees–that’s the ideal germination temperature. I think a permanent greenhouse would work, but anything temporary might not have enough protection from the cold.
Good luck! Emily
Emily,
I started my seeds indoor last year with great success. But this year I don’t have the ‘room’ available anymore. I am thinking of putting the shelves and lights in our garage. The problem is that is NOT insulated and is cold (I am in UT too.). Do you think I will need a heating mat underneat the trays? Another option is a greenhouse in our deck, but again, I am afraid the night temperatures will kill everything!! Any advice?? Garage with lights + heating pads or greenhouse (do I need the lights above?) Thanks for your GREAT help!!!
I’ve thrown away entire batches and started over almost every year. It’s great to read books and websites, but nothing helps like experience! I watch the peat pots–they change color as they dry out. I water when they seem to need it–not totally dry. If you are using regular pots, you’d stick your finger down about an inch and it should still be somewhat moist. Try that with your peat pots, and then notice what they look like when they’re ready for some water.
Emily,
I definitely think that I drowned my poor little seeds. I replanted yesterday and took out all the water. My containers are pretty big and there aren’t even plants in there to soak up all the water, so I put a little lid under the plants and only a small amount of water. Do you wait until the pots are dry to the touch before you water again?
Alison–First, let me clarify that I live in Utah where it is DRY DRY DRY. So over-watering was never a problem, I just waited 24 hours for stuff to evaporate. But depending on where you live, you do want to be careful not to water too much. Especially when just planting, when you often cover everything up to keep it humid. If there’s too much moisture your seeds will rot. If you are worried, pour out or soak up some water with a towel.
In general, that is how I water–just pour it in the bottom of the tote and let it soak up. But I only water when the peat pots are looking dry–that’s one thing I liked about them, it’s easy to see when to water. Just play it by ear at first, and you’ll figure it out!
Emily,
I’m hoping you can clarify the starting procedure a bit. I’ve started my parsley & cabbage in the garage . . . but I’m afraid I may be drowning them. How do you water when they are in the tote? I have standing water in the bottom & the peat pots are quite wet.
Michelle,
I bought the cheapest ones. Then I bought two different bulbs, a warm and a cool. That should provide full-spectrum light without paying a ton for light bulbs!
I just found a video on youtube that readers might find helpful for building their own light stand… i thought I’d share. 🙂
Hi Emily, 🙂
I am getting excited to get my seeds started this year. I’d like to use grow lights but I was kind of confused when I got to home depot and started looking at the shop lights. I’d love to duplicate your system but I can’t figure out which shop light to buy. Could you give me some pointers on which ones to buy? Thanks so much for all of your help!!
~Michelle
My seed starting operation is in my unfinished basement, so I hung mine from the beams in the ceiling. I used half rope, half chains (so it was easy to move up and down).
Just tall enough to fit your pots in and then get the lid on. You mostly keep the lid on until they sprout, and then you want to be able to get your lights really close to the plants (like 1″ above). So it just depends on the size of your pots!
I’m so excited to start my seeds this spring! I have one question for you. What did you hang your shop lights on? Did you build a stand?
How high do your totes need to be?
I use a couple. First is ferti-lome Blooming & Rooting plant food, which is 9-59-8. I also use Miracle-Gro Tomato Plant Food, which is 18-18-21. I’m still experimenting with fertilizers (both organic and chemical) and once I’ve come to a conclusion I’ll write a post on it!
What fertilizer do you use for your indoor transplants?
Thats a FABULOUS idea! I may try that next year. The peat pots and plastic containers would have been much easier on both the plants and myself. I used one of those self watering seed trays. Although everything was there in a nice convenient little package…it was difficult to get the seedlings out of the tiny squares.